This is part of my Image Conversion Workflow.
Every photographer has a method for storing images on a hard drive. I have taken methods from various sources including Mastering Landscape Photography by Alain Briot and The Adoboe Photoshop Lightroom Book by Martin Evening. Based on these sources and my experience, I offer the following formula you are free to use or modify.
Rule Number One: The directory structure is independent of any image organization other than finding a negative or a slide after scanning it.
First let’s discuss film and slide image management. These image mediums need scanned whereas digital cameras create digital images to download and immediately use. Negatives and slides are created from a single roll of film. Before computers these were stored in protective sleeves or poly-propylene pages in a binder, but they were always stored by roll. You would have a hard time finding a photographer that would cut up his negatives and sort the frames by the type of picture.
Digital management of negatives and slides should be no different. Do not worry about selecting some frames on a negative and putting those scans in one directory while placing images of other frames in another. What if a frame has two different categories? Say an image has a waterfall with mountains in the background. Would this be filed under mountains or under waterfalls? This is what the Lightroom Library is for.
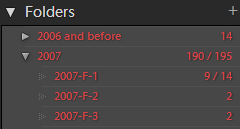
Folder structure in LR
Instead, store the negatives and slides by rolls. I use the following structure: Year – F,S or D – Sequential Number. The year is first to help sorting in windows and allows me to catalog rolls of film by the year taken. Second, the letter ‘F’, ‘S’ or ‘D’ clues me in to what type of film images are in the directory: Film, Slides or Digital. Finally, I assign a number. Other than being an index, the number is meaningless. It is simply the next number in line. For example, the second roll of film I scan in 2008 will be called: 2008-F-2. Also, the second roll of slides I scan in 2008 will be called 2008-S-2. Note that I start with ‘1’ for each type of film and move forward. This is because each of the three film types are physically stored in separate places. This will be discussed in a future article.
Thus, Rule Number Two: Use a directory structure of [Year] followed by the film type [F, S or D] followed by a sequential index number.
It is important not to stop with the directory organization. Follow up by marking the assigned number on the negative storage sheet or the slide boxes and slide frames. Write the full ID number on the storage sleeve. To continue our example above, label your negative sleeve with the shoot date, location, any other info you want to house and use an index number of 2008-F-2. For the slides, not only mark the storage container, but mark each slide with an index of 2008-S-2-# where ‘#’ represents the scanned image number. This might be the same as the slide number or it might be different. I try to match slide numbers and frame number with the image id, but sometimes that is physically impossible. I also try to use the ‘a’ next to the frame number for negatives that are split between numbers.
Finally, Rule Number Three: label your film sheets and slides with the assigned directory name. Additionally, assign the image number with the directory name on each individual slide. This is the only assured way to locate the physical film when referencing a digitally scanned image.
Remember that once you have the image in Lightroom you can assign as many keywords as you like and these keywords are what you will use to find an image in the computer.