There are so many panels available to open in each of the Lightroom modules that your screen can easily begin to resemble the aftermath of a tornado. Keeping too many panels open can also reduce the efficiency of using Lightroom. This Lightroom tip will show you how to use your panels effectively to keep your focus on what you need to work on.
 There is a menu item for each panel entitled Solo Mode. This menu item is what controls how many panels can be open on each side of the screen. It operates the same for all of the modules in Lightroom and for any of the panels. When Solo Mode is turned on, then only one panel can be open at a time on that side of the screen. This means clicking on the arrow of a panel or the panel itself, will open that panel and close the previously open panel. There is an example of this further down.
Turning On Solo Mode
Solo Mode can be turned on by right-clicking a panel title in any column of panels. Then select the Solo Mode Item as shown in the image above. Note that this will only turn on the Solo Mode for that column of panels. Each column retains it’s own setting so Solo Mode can be active in the Develop Module, but not the Print Module. The other method is to hold the ALT key (Option in Mac) and click on an arrow in one of the panels. To turn off the Solo Mode you must right-click and de-seletct the menu item.
How To Tell If Solo Mode is Active
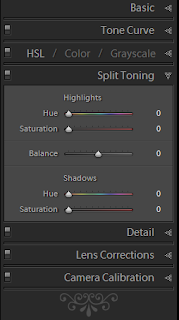
 You can tell if the Solo Mode is active by the style of the arrows in the panel. Notice in this image the arrows are spotted instead of solid. This indicates that Solo Mode is on and only one panel will be open at a time.
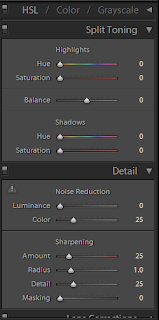
 Notice how here multiple panels are open causing the need to scroll up and down to see all the available options. Also notice how the arrows on each panel are solid and not spotted. This is an extremely in-efficent mode for many of the panel columns throughout Lightroom.