After scanning our images, importing the images into lightroom is the next step in our Image Conversion Workflow. Fortunately, Lightroom has a powerful and easy to use interface to accomplish our import.
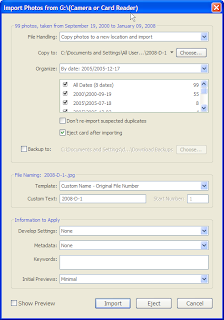
 By pressing the Import button at the bottom of the Library view or by using the File, Import Photos from Disk menu item, we choose a source for our images and access the dialog to the left. Note that you can bypass these menu items by dragging a folder or files from Windows Explorer directly onto the Lightroom Library. The import dialog box will open with those files already selected.
There are a plethora of options in this dialog box and all of the options are customizable. The power of this import workflow from Adobe is that after setting up some basics, importing becomes easy instead of a dreaded task.
We will cover these options over several articles as they are grouped in the dialog box. These are the File Location, File Naming and Information to Apply.
After importing our images, we will move on to applying metadata and keywords so that we can get the most efficiency out of our powerful new tool.
UPDATE: This article discusses the general concept of the import dialog box for Lightroom. We discuss a more detailed approach to importing of images, the backup process and any conversions desired in a new article: Backup, Import, Backup.