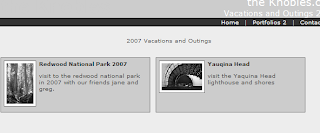
The Turning Gate has created some fantastic galleries that easily install into Lightroom and make creating web site work much easier. Today we will look at the Auto Index template which automatically loads albums as they are published. This previously manual work has now been automated.
First, download the template and install it according to the directions from The Turning Gate. You can see an example of the template in action here.
 This is an example used on my wordpress site. However, I had to modify the code somewhat. I use SUSE Linux 10.3 and apache 2.2.4 with the most current version of PHP. However, when I used the template without modification, I was getting the PHP code as the name of the album with no picture or other text shown.
The fix was relatively easy. Find the directory where you installed the template and edit the index.php file. Go down to the bottom where the html is being written in the div tags. Replace the following code:
<?=
with new code:
<?php echo
Be sure to put a semi-colon at the end of each item before the closing tag. See the following example for the complete code:
            < div class="albumBox">
                < div class="albumBoxContent">
                    < div class="albumThumb">
                        < img src='<?php echo $albums[$i]['thumbnail']; ?>' class="thumbImg" title='<?php echo $albums[$i]['title']; ?>' alt='<?php echo $albums[$i]['title']; ?>' />
                    </div>
                    < div class="albumDescription">
                        < p>< strong><?php echo $albums[$i]['title']; ?></strong>< /p>
                        < p><?php echo $albums[$i]['description']; ?></p>
                    </div>
                    < div class="albumLink">
                        < a href='<?php echo $albums[$i]['url']; ?>'>< span>Open Album</span></a>
                    </div>
                </div>
            </div>
That’s all there is! Save the file and then restart Lightroom. After that change, the auto index template worked perfectly for me. I uploaded another album to a subdirectory from the auto index and following the rest of the directions from The Turning Gate, all worked perfectly!
Thanks TTG for a great set of templates!