This is part of my Scanning Images Workflow and the settings used on my negative to digital image scanner.
Film Grain and GEM
Film grain is similar to noise present in a digital image from a CCD. Film grain isn’t as noticeable in slower speed films and small print sizes. However, any sizable print or high speed film has a tendency to show the sand like grain of the film. While many noise reduction programs work well, GEM is most commonly found in negative and slide scanners, so we will discuss the use of GEM in our film to digital workflow.
GEM or Digital GEM, was developed by Kodak for use with Adobe Photoshop and a variety of film scanners. The Nikon CoolScan Scanners carry GEM as part of their included scanning software. The concept is to view the grain through each of the three color layers and then remove that grain information from the digital image while keeping the detail. Kodak indicates that removing the grain effect while keeping the color shades and details will help 35mm film rival the larger format cameras. While larger format negatives have details surpassing 35mm, the GEM product has the ability to assist in grain removal that does enhance any size enlargement of a 35mm image.
Specifically, the GEM algorithums work well with scans of color negatives and slides. However, our focus is on the black and white negative. All of our comparison scans originate from Ilford HP5 black and white film exposed at 400 ASA and developed with Ilford Ilfotec DD-X fine grain developer. The scans were made with a Nikon CoolScan 5000 using the negative attachment. Scans were made at 4000 dpi and 16bit greyscale TIFF images were saved resulting in 40mb files. These image files were imported into Adobe Lightroom and compared side by side. The results are below.
GEM Zero – No GEM
The image below shows a native scan with GEM turned off or set to zero.

GEM amount zero
Notice how spotted the image is. This view is from Adobe Lightroom at a ration of 1:1 and encompasses the rock outcropping that is part of a waterfall. Let’s see what some added GEM processing will accomplish.
Gem 4 – All the Way
Rather than stepping through the settings on the Nikon CoolScan 5000, let’s see the most processing that can be enabled. The image below represents GEM processing at level 4 or the most available through the Nikon CoolScan.
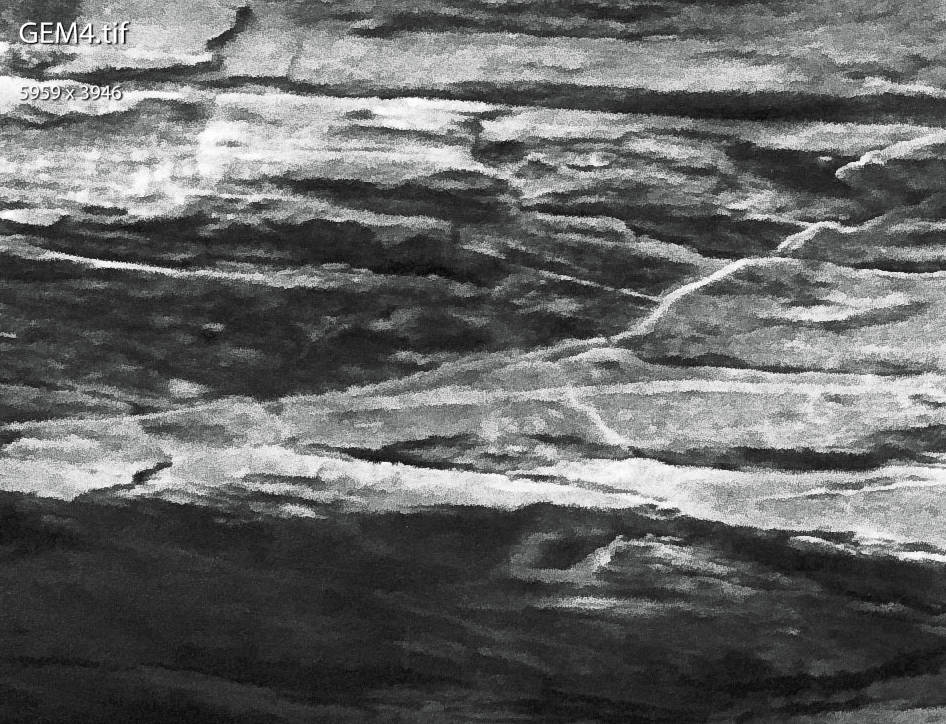
GEM amount four
Notice how the image looks a little less crisp, but much less spotty. This is the maximum grain removal for black and white films. The comparison is in the fine details to see if a little sharpening can bring them back out.
Compare GEM 0 to GEM 4
Let’s compare the native scan with a GEM 4 scan side by side to see what differences are apparent. The following image was made through Adobe Lightroom while comparing the two images above.
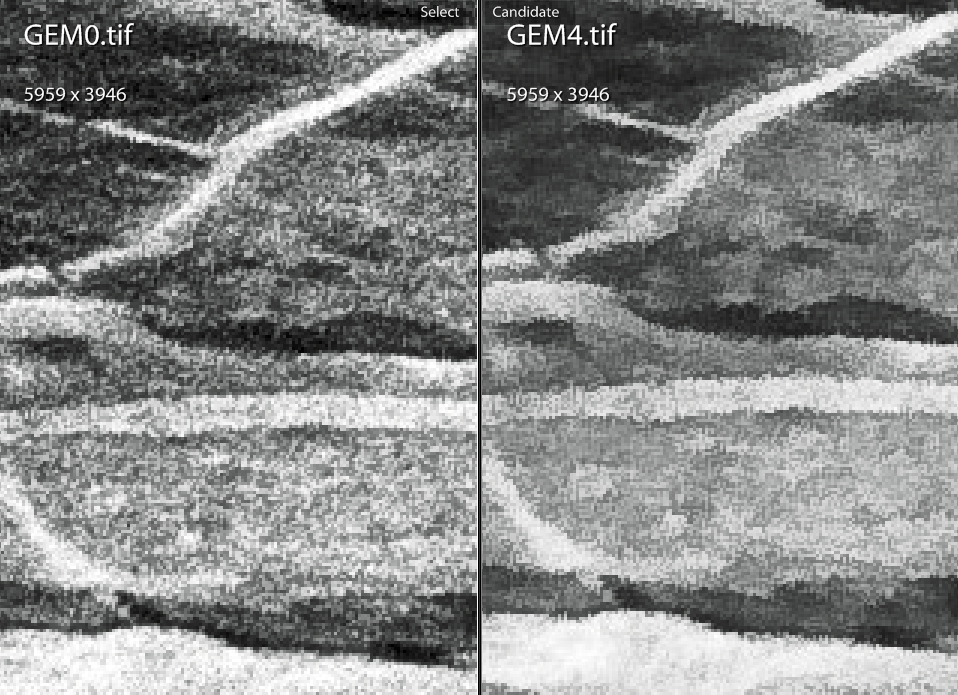
GEM zero vs GEM four
Notice how the contrast between the grain is lowered to match the surrounding pixels. This comparison was done at a ratio of 3:1, or three pixels on the screen to match one image pixel. The results are much more dramatic at this magnification.
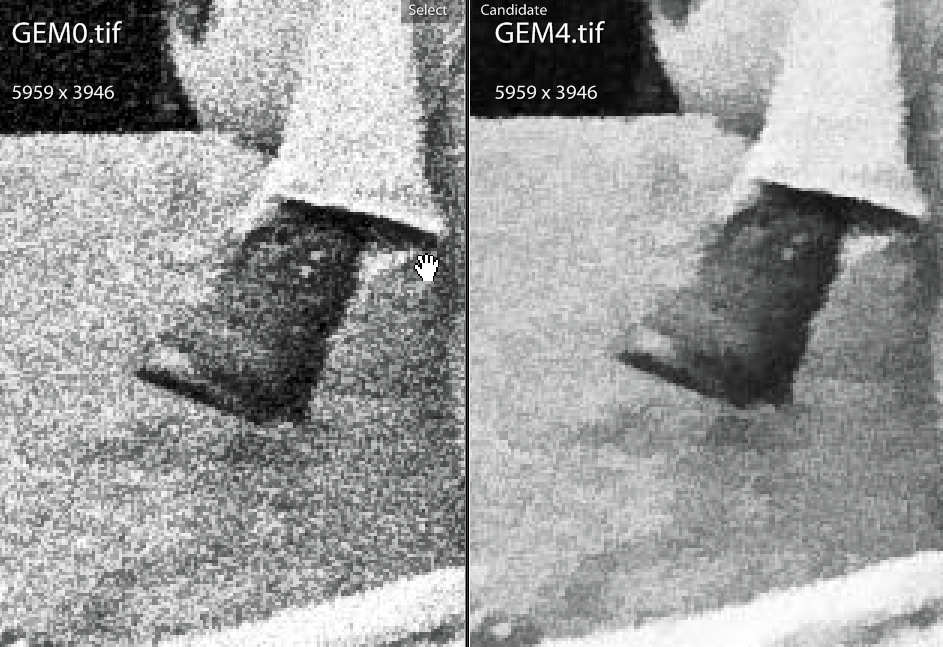
GEM zero vs GEM four – boot detail
Here is the same image, at the same 3:1 magnification, but the viewing area is of a hiking boot. Notice how the highlights of the boot laces are muted in the GEM 4 processing image. Thus, the loss of contrast in the grain is apparent and will help some images improve immensely while some details will begin to fade away as well. Sharpening my not be enough to bring those details back.
Gem 0 versus Gem 2 – A Little Processing
See the image below where the same boot area is compared, but using Gem 0 versus Gem 2, or about 1/2 processing.

GEM zero versus GEM two
Notice here how the contrast is lightened somewhat compared to the native scan, but that the boot lace detail is still visible and has plenty of contrast. In these extreme detailed settings, a higher GEM setting can actually hurt more than help.
Sharpening Workflow
While there are no examples here of the effects of sharpening after using the GEM processing, the level of contrasting details will have a noticeable effect on the sharpening outcome. The larger the output, the heavier the sharpening may be. Careful integration of this grain management must be used with your current sharpening techniques. The best text, by far, I have ever encountered on Sharpening is Image Sharpening for Adobe Photoshop by Bruce Fraser.
Conclusion
GEM is a tremendous tool to reduce the effect of noticeable grain. If used carefully, a mix of lower contrast between grain particles, but no noticable lack of detail can be achieved. However, full blown GEM 4 settings can result in some lost detail if not careful.
For most images I use a GEM setting of either 1 or 2 depending on the scene. The Nikon CoolScan settings are saved so that I can pull them up quickly and use the same settings over and over. For images that are extremely important, a quick test of the GEM setting for that image may be necessary.
There have been very few cases in my black and white scanning where I found GEM 3 or GEM 4 produces pleasing results. I have not done extensive tests in RAW files, so I do not know if the color layers behave differently. Using a light GEM setting is better than no GEM setting at all. The best solution for grain management is the best exposure coupled with meticulous development techniques. Thus, GEM is not a cure for poor photography, but GEM will assist in converting negatives to digital images.
NOTES:
The GEM settings discussed here are based on the 0-1-2-3-4 settings of the Nikon CoolScan scanning software that accompanies the scanner. Other software may have different levels of GEM processing that do not coincide with these settings.