This is part of my Image Conversion Workflow.
Backup is a dreaded word because it doesn’t seem to do anything except take time. However, backup is a most important word because without, your image is like carrying tissue paper beneath an umbrella in the rain – it will most likely get destroyed at some point.
Lucky for us, Adobe Lightroom has an excellent backup system built in. The export tab allows us to take pictures from our library and perform a variety of transformations. The export tab also allows us at the end to burn the results to CD or DVD.
Selecing Images to Backup
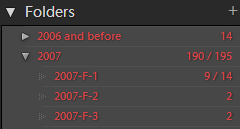
To begin the process, first select the images you wish to burn. The easiest way to do this is by selecting the folder containing the images you just imported.  In the case of scanning slides or negatives, this should only be one folder. In the case of a digital camera, it may be several folders containing recent dates and times.
After selecting the folder, click on an image shown in the library group screen. If only one large image is shown, your are in the loupe view. Press G to go to the Group View (see the importance of learning lightroom shortcuts). Then press Ctrl-A or the menu item Edit, Select All. This will select the entire folder(s) for exporting to burn.
Exporting to CD Burner
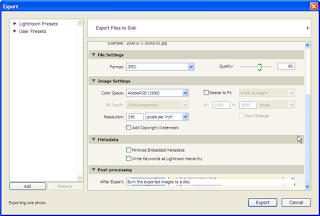
Press the menu item File, Export to retrieve the following dialog: 
Here is where the fun begins. First, set a location for a temporary burn. I created a subdirectory in my negatives directory called _DVDBurn. Then select the file naming convention. I use the template Filename which uses the exact same name on disk with no modification. This is important to use for a backup so that you can find the exact image you need later on. While the choices are wide and varied to manipulate the filename, this is best done when importing files and not while backing up.
The next choice is also important – file settings. You can choose JPEG or TIFF and it is tempting to do so, especially if that is the file type you are trying to backup. However, for our true backup purposes, choose Original to be sure you make a copy of the existing file without making the filesize larger than it has to be. You will notice then that the image settings are all greyed out. This is because we are using the original file type with no modification. Note that I make different choices when backing up RAW files from digital cameras.
The meta data settings are next. Make sure Write Keywords as Lightroom Hierarchy is checked for maximum compatibility.
Finally, the last setting is post-processing. Here we choose Burn the exported images to a disk. This is what actually makes the backup for us. Note that at the bottom of the dialog box, the number of images to export is shown. This is a good check to be sure it doesn’t say one image, but about the number you expected.
Saving the Backup Settings
Since we have these settings the way we want them, save them so we can reuse them without having to check everything again. Press the Add button on the left and type in some meaningful name, like DVD Backup Original Images. You will see it added to the choices on the left. By clicking on it, you can apply those settings instantly. The presets function in Lightroom is available everywhere and highly useful.
Processing the Files
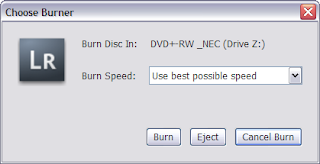
 To continue, insert a CD or DVD in your disk burner and press the Exporting button. The upper left hand corner of the Lightroom window will show your progress. After the images are processed, a dialog box shows asking which burner to use.
 Note that if no writeable disk is inserted in a CD drive, then the Burn button is unavailable. Insert a blank CD or DVD and wait for the system to recognize it. Then the Burn button will be available. Also note that if your screen saver turns on in Windows, the dialog box might appear empty with no information or buttons on it after restoring the screen. By moving the mouse around the windows, the buttons and choices appear again. It must have to do with windows repainting the dialog box and that is a programming and operating system issue. I don’t know if this happens in the mac operating system or not.
Naming the CD or DVD
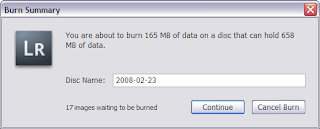
 After selecting the burner to use, you get another dialog box asking for the name of the first disk to use. Type any name you want using dashes between words. Also, only use a lone number ‘1’ at the end. Lightroom will automatically increment this number for each disk. However, if you use ‘Disk1’ at the end, Lightroom doesn’t know to increment the number and adds a dash and number to the end for the next disk – ‘Disk1-2’. The solution is to use the format ‘Disk-1’ in which case Lightroom will increment the next disk to ‘Disk-2’. I use the year and month of the images followed by a dash and number one. For example, images from February 22, 2008 would be 2008-02-22-1.
Writing the Disk
Lightroom will then process your images, write them to disk and, most importantly, verify the disk. While you can do other work in Lightroom while this process is going on, I find even with a dual 3.0mhz pentium and 4gb of memory that Lightroom is sluggish. I also don’t want any trouble with my backup, so I just let the computer run it’s course.
Finishing the Burn
Lightroom ejects the cd drawer when finished, so it’s easy to look and see when the export is finished. Simply put another disk in, wait a moment to let the computer recognize it, and press the Continue button to burn the second and subsequent disks.
Always make backups of your images as soon as you import them. You will eventually lose something. About six years ago I had a network drive go bad with about 10 years of images on it. Some were not backed up and I permanently lost them. They were of my two boys and I’ll never get them back. Learn from my mistake.
Technical Note
While I do not see it documented, it appears that Lightroom does empty the burn directory before starting each burn. Thus, while you have some leftover files between burns, they don’t just keep stacking up losing your free disk space. I just leave the temporary files there and don’t worry about it.